Mastering Sourdough: Share Your Favorite Techniques

Sourdough bread has taken the culinary world by storm, captivating both novice bakers and seasoned professionals alike. Its unique flavor profile, chewy texture, and the satisfaction of creating something from scratch make it a beloved staple in many households. But what truly sets sourdough apart is the art and science behind its fermentation process. In this post, we will explore various techniques to help you master sourdough baking, share tips for troubleshooting common issues, and provide insights into the best practices for achieving that perfect loaf.
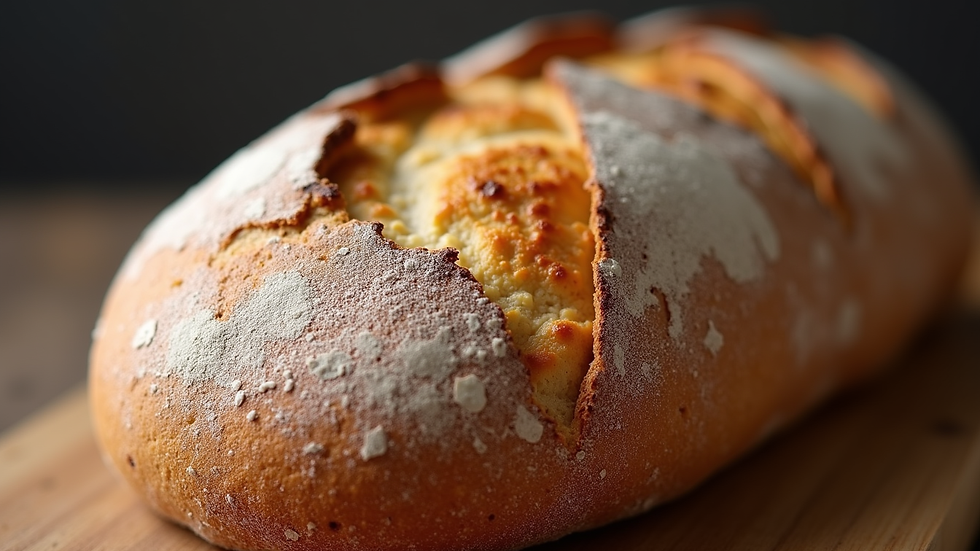
Understanding the Basics of Sourdough
Before diving into techniques, it’s essential to understand the fundamentals of sourdough. At its core, sourdough is made from just three ingredients: flour, water, and salt. The magic happens when you introduce a sourdough starter, a mixture of flour and water that captures wild yeast and bacteria from the environment. This starter is what gives sourdough its characteristic tangy flavor and airy texture.
What is a Sourdough Starter?
A sourdough starter is a living culture that requires regular feeding and maintenance. It’s the heart of your sourdough baking journey. Here’s how to create your own starter:
Day 1: Mix equal parts of flour and water (about 100 grams each) in a jar. Stir until combined and cover loosely with a cloth.
Days 2-7: Feed the starter daily with the same ratio of flour and water. You should start to see bubbles forming, indicating that fermentation is taking place.
Ready to Use: After about a week, your starter should be bubbly and have a pleasant sour smell. It’s now ready to be used in your sourdough recipes.
Essential Techniques for Sourdough Baking
Now that you have a basic understanding of sourdough and your starter is ready, let’s explore some essential techniques that will elevate your sourdough game.
Autolyse Method
The autolyse method involves mixing flour and water and letting it rest before adding salt and starter. This technique enhances gluten development and improves the dough's extensibility.
How to Do It:
1. Combine your flour and water in a bowl.
2. Mix until no dry flour remains.
3. Let the mixture rest for 30 minutes to 2 hours.
4. After resting, add salt and your sourdough starter, and mix until fully incorporated.
Stretch and Fold Technique
This technique helps develop gluten strength without intensive kneading. It’s particularly useful for high-hydration doughs.
How to Do It:
1. After the autolyse, let the dough rest for 30 minutes.
2. Wet your hands to prevent sticking, then grab one side of the dough and stretch it upwards before folding it over itself.
3. Rotate the bowl and repeat this process for all four sides.
4. Allow the dough to rest for another 30 minutes and repeat the stretch and fold process 3-4 times.
Bulk Fermentation
Bulk fermentation is the first rise of your dough after mixing. This is where the dough develops flavor and structure.
Tips for Successful Bulk Fermentation:
- Keep the dough in a warm environment (around 75°F to 80°F) for optimal fermentation.
- Monitor the dough’s volume; it should increase by about 50% during this time.
- Use the poke test: gently poke the dough; if it springs back slowly, it’s ready for shaping.
Shaping the Dough
Shaping is crucial for creating tension in the dough, which helps achieve a good rise during baking.
How to Shape:
1. Turn the dough out onto a lightly floured surface.
2. Gently flatten it into a rectangle, then fold the edges towards the center.
3. Flip the dough over and use your hands to create surface tension by pulling it towards you.
4. Place the shaped dough seam-side down in a proofing basket.
Final Proofing
The final proofing is the last rise before baking. This can be done at room temperature or in the refrigerator for a cold proof.
Room Temperature Proofing: Let the dough rise for 1-3 hours until it has visibly expanded.
Cold Proofing: Place the shaped dough in the fridge for 12-24 hours. This enhances flavor and makes scoring easier.
Scoring the Dough
Scoring is the act of making cuts on the surface of the dough before baking. This allows for controlled expansion and creates beautiful patterns.
How to Score:
1. Use a sharp blade or lame to make a quick, decisive cut on the surface.
2. Experiment with different patterns, such as a single slash or a cross.
Baking Your Sourdough
The baking process is where all your hard work pays off. Here are some tips for achieving the perfect crust and crumb.
Preheating the Oven
Preheat your oven to a high temperature (around 450°F to 500°F) for at least 30 minutes before baking. This ensures that your bread gets an initial burst of heat, which is crucial for oven spring.
Using a Dutch Oven
Baking in a Dutch oven creates a steamy environment that helps develop a crispy crust.
How to Bake:
1. Place your Dutch oven in the oven while it preheats.
2. Carefully remove the hot Dutch oven and place your dough inside.
3. Cover with the lid and bake for 30 minutes.
4. Remove the lid and bake for an additional 15-20 minutes until golden brown.
Troubleshooting Common Issues
Even experienced bakers encounter challenges. Here are some common issues and how to address them.
Dense Bread
If your sourdough is dense, it may be due to under-fermentation or insufficient gluten development. Ensure you allow enough time for bulk fermentation and perform stretch and folds to strengthen the dough.
Flat Loaf
A flat loaf can result from over-proofing or not enough tension during shaping. Pay attention to the dough’s volume and ensure you shape it tightly.
Crust Too Hard
If your crust is too hard, consider reducing the baking time or temperature. You can also try covering the loaf with foil during the last few minutes of baking.
Conclusion
Mastering sourdough baking is a rewarding journey that combines art and science. By understanding the techniques and principles behind sourdough, you can create delicious loaves that impress family and friends. Remember to experiment, be patient, and most importantly, enjoy the process.
Now that you have these techniques at your disposal, it’s time to roll up your sleeves and start baking. Share your favorite sourdough techniques and experiences in the comments below! Happy baking!
Comments